Month: February 2004

5-Gallon Container to Hydroponic Conversion


I cleaned out one of the 5-gallon containers to convert it to a self-contained hydroponic system. If you view the original photos here, you can get an idea of what I am about to describe.

I removed the one-inch filler tube and passed the power cord of a tiny submersible hobby pump up through the hole. To the outlet of the pump, I attached a length of 3/8″ ID vinyl tubing, which was also directed up through the hole alongside the power cord. The wick cup remained in place to function as it had originally, in case of pump or power failure. Cypress mulch was then used to fill the container to within about 3″ of the top. The top bucket was then inserted into the bottom bucket. Water was added from the top until the bottom bucket overflowed from the original overflow hole. The bottom bucket was then emptied to dispose of the fine debris that rinsed out of the cypress mulch. The bottom bucket was then filled with one gallon of clean water, and appropriate nutrient added. The system was then re-assembled and the pump powered on. Adjustment of flow rate is accomplished by rotating the vinyl tube, which results in the turning the outlet of the pump which has a variable flow restrictor.

The pump is a ZooMed MicroPump 104, designed for reptile tanks or the like, and available for under $15 usually. Its rated flow is adjustable from 35-70gph, which translates to about .5-1gpm. I also like the fact that it can run dry without damage.

I planted an already-sprouted mirliton– aka vegetable pear or chayote squash– someone gave me to see how it would do. You can see it here.

I came to realize, after a few hours operation, that more particles found their way to the pump intake, slowing it considerably. An aquarium filter pad, about 4″ by 6″, wrapped around the pump and secured by a rubber band provided a solution.

Dscn0299a.jpgDscn0300a.jpgDscn0135a.jpg

PowerEdge 400SC Server


Haven’t done any geek writing in a while, so it’s time to share my latest tech project. It’s the Dell PowerEdge 400SC server. It’s a not-so-well-kept secret that this affordable server, from Dell’s Business Systems Division, can quite easily be adapted for use as a high-performance desktop as well.

For many years, I have received much better value and satisfaction assembling my own home computers from variously obtained parts. I got exactly what I wanted– no more, no less– and didn’t have to suffer pre-installed bloatware and limited upgrade paths.

Back in those days, a name brand computer most likely meant proprietary motherboards with built-in peripheral components like video and sound that left much to be desired. Not to be unexpected were even proprietary versions of operating system software, too. Names like Packard Bell and Compaq Presario come to mind.

These days, however, home computer technology is sufficiently advanced that even the most basic onboard peripherals are perfectly acceptable for most users, unless they are involved in high-end gaming, or computer graphic or design work.

The PowerEdge 400SC can be had with a Celeron 2GHz processor, 40GB hard drive, 128MB of SDRAM, and a 48x CD-ROM for as little as $274 if you catch the right promotional deal. At this price point, and with an included one-year on-site warranty, there’s no reason to consider building your own system any more.

Even better value can be had by upgrading to at least the Pentium 4 2.4GHz processor, as it supports higher-speed DDR400 memory, and also Intel hyperthreading technology which allows the machine to operate– under certain conditions– as if it has two processors installed. Additional memory is recommended, and is required to run the system in a higher-performance dual-channel mode. Mine is a 2.4GHz, and has a minimum 256MB of DDR400 configured for dual channel.

As it is a sold as a business server, the 400SC comes with little in the way of software– none, in fact. The user must supply an operating system, and also drivers for the installed and onboard peripherals. The typical home user will install a copy of Windows XP Home Edition, or, preferably, the Professional Edition. (Actual business users would be likely to employ a Windows Server OS, or a Linux-based solution.)

Drivers may be obtained from– where applicable– Dell’s or Intel’s websites, the video card manufacturer, or from a web forum dedicated to afficionados of this machine.

Of further interest is the heritage of the 400SC. It’s mainboard is produced by Intel for Dell, and is essentially the same as the one found in Dell’s higher-end Dimension and OptiPlex models– models which sell for hundreds of dollars more.

In fact, if you peek through the holes in the 400SC’s front panel, you will see the front USB ports and headphone jack found on the aforementioned premium desktop models. Apparently, it would cost Dell more to have the server model produced differently without the front panel components, so they leave them in, just covered and inaccessible. The USB ports are actually connected and functional, not that you’d probably need them– there are six more on the back panel, all high-speed USB 2.0. And the headphone jack could even be activated by purchasing a $5 cable.

Two other vestiges of the higher-end desktop models include– neither officially supported by Dell– an 8X AGP video slot and onboard sound.

Other plusses include virtually silent operation, a tool-less case and a Gigabit ethernet NIC.

Update: Time marches on, and, sadly, the 400SC has been discontinued as of November 2004. Afficionados are attempting to embrace other models that have replaced it, but have not as yet equalled the 400SC for ease of adaptation to desktop use.

Pork Butt Roast


It’s been quite a while since I did a pork butt roast. I usually do what is called a small or a half, typically around 4 lbs. I wanted to try to go all out and do a bigger one, and, for my household, a 7-pounder seemed about the right size to try.

A Weber Bullet owner knows his cooker is capable of not only very stable temperatures, but of maintaining them for very long time periods as well. Knowing this, a lot of Weber Bullet owners cook pork butts overnight, because, at barbecue temperatures, pork butt takes 1-1/2 to 2 hours per pound to reach the desired internal temperature of 190 to 205*F. Doing a little math, we realize that a 7 pound pork butt roast should take from 10-1/2 to 14 hours to finish.

Those unfamiliar would ask “Why so high a temperature? Pork is considered cooked well below 190*F.”

This is where we have to remind the casual observer that the aim of true barbecue is to take otherwise tough and/or fatty cuts of meat and, by cooking them at low temperatures for long periods of time, render out fat and break down tough connective tissue. Barbecue meats need to be cooked– it is said– beyond doneness to the point of tenderness.

In this case, I wasn’t interested in an overnighter, because I was not shooting to be done for a specific dinner time. Instead, I chose to get started right after Sunday breakfast– around 10:00am.

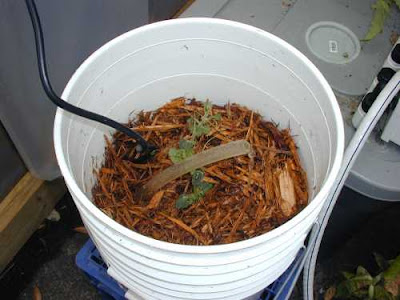
I opted to fire up the cooker using an alternate method known for maintaining long, even burn times. To accomplish this, the charcoal ring is filled full of unlit briquets, and a small amount of lit charcoal is placed on top. This small amount then slowly ignites adjacent briquets, and, eventually, the entire bed is lit– just not all at once. Some would question the advisability of cooking over charcoal that has not been fully lit, but this method in fact does not taint the food with any undesirable taste.

For my starter coals, I chose to re-light some used briquets from a previous cook. I know from experience that these used briquets burn hotter than new charcoal, and I theorized that such hotter-burning coals would be particularly suited for getting the cooker temperature up to target more quickly.

Those familiar with good barbecue are acquainted with the concept of a smoke ring, which is the reddish coloration the edge of the meat takes on when smoke-cooked. A chemical reaction takes place, but only within a specific temperature range, and then stops once the high end of the range has been exceeded, which explains why this “ring” only penetrates the meat a fraction of an inch. Therefore, in order to form a pronounced smoke ring, one must apply smoke to the meat while it is in this specific temperature range, between 40 and 140*F.

Some observers familiar with true barbecue would ask, “If you’re going to do a long cook like a pork butt, why not let the meat come to room temperature before cooking, like I’ve heard some people do?” My answer would be two-pronged. One, you would not want to let raw meat sit off refrigeration for too long due to food safety concerns. Second, even if you set a sizeable pork butt roast out for a couple of hours, the mass of the meat would not allow its core temperature to rise appreciably.

Another thing barbecue cooks know is that, when a large piece of meat is placed into a hot cooker, the temperature will drop considerably because of the cold mass introduced into the chamber. To address this issue, I decided to try something different.

Typically, the firing and set-up of a Weber Bullet or similar cooker involves lighting the fire by some method, and also introducing a temperature-stabilizing heatsink. In the case of the Bullet, the standard heatsink is the water-filled pan below the cooking grates.

Some Bullet owners, in a effort to avoid spilling water on hot coals or to facilitate clean-up, have switched to using sand in the pan. There is some debate as to whether sand is better than water as a heatsink or not. The pro-sand camp cite the reasons just stated, adding that sand– unlike water– does not need to be replenished like water does. The traditional water camp, however, would point out that sand continues to absorb heat far past the 212* point water does, and it (sand) can therefore become an undesirable radiator of heat over time.

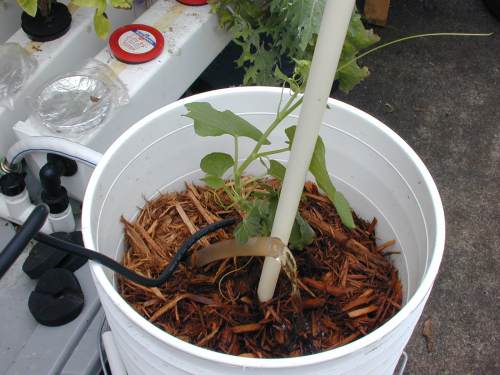
So, my different approach for this cook went like this: I wanted to put the meat on right out of the refrigerator to maximize the smoke ring. But, I didn’t want to fight to get the cooker temperature up to my target any longer than I had to. So, I theorized that, if I began cooking with no heatsink, the overall mass available to absorb heat initially would be limited to only the meat itself. My plan was to leave the pan empty until the cooker temperature had come reasonably close to my target, and then add very hot tap water to the pan.

Long story short, it worked perfectly. Even cooking on a cold 57* day, with light wind, my cooker hung at a stable 250* for 13 hours, with fuel to spare.

Once I reached 150* meat temp, I foiled the roast since I knew it had received plenty of smoke, and was past the point of further smoke ring formation. Once the roast hit 198*, I pierced a few holes in the bottom of the foil to let rendered fat drain into the water pan. I continued to cook until I achieved a final meat temperature of 205*.

Once remove from the cooker, I rested the still foil-wrapped roast for about 15 minutes. Upon unwrapping, the bone pulled cleanly from the meat with no resistance whatsoever. I used two carving forks to easily shred the still very hot meat into pulled pork. The net from the 7.17-pound roast weighed right at 4 lbs.

BBQ Meat: Price vs. Value


I find fascinating the wide range of meat prices you can find from store to store on any given Sunday. Of course, there are considerations like USDA grades, amounts of trimming, and prevailing price levels due to other factors, but, all too often, more attention is paid by the consumer to price rather than to value.

Here’s a little math I did based on the three racks of spares I did recently:

Rack #–Price/lb.–Wt.—–Net Wt. After Trimming

1——-$1.69——3.97—-2.06

2——-$1.69——4.21—-2.12

3——-$2.29——3.62—-1.81

Yes, literally half of each pack’s weight was trimmings and scraps packed underneath the racks, in addition to what I removed. So, for each of these trimmed-to-St. Louis-style racks, I ultimately paid $3.26, $3.35, and $4.58, respectively, per pound for the privilege of trimming them myself.

This week, I took a closer look at the spares at the high-end grocery I frequent for the extensive wine selection– they had already-trimmed spares on sale for $2.79/lb, and no scraps or breast bones buried under the racks in the packs. Here’s what I got— no more, no less. Think I’ll stock up.