Month: March 2003

Brisket Flat

Posted by March 31, 2003

I bought a trimmed brisket flat for $1.19/lb. At about 4.75 pounds, it woudn’t be an extended cook. A “flat” is one of two parts that comprise a “whole” brisket. The other part, known as a “point” is not usually offered for sale separately. The point is typically fattier than the flat. The two parts are essentially two different muscles from the breast area of the cow connected in a sort of offset manner by a vein of fat. Brisket flats are usually offered trimmed of most if not all of the layer of fat known as the “fat cap”.

I prepped the flat the night before, by sprinkling both sides liberally with McCormick’s Montreal Steak Seasoning. Sounds unconventional, but it proved very tasty.

Firing up the Bullet conventionally, I used 2 Weber chimneyfulls of Kingsford. I took the opportunity to try out my new Polder remote digital thermometer.

Temperatures on the Bullet stabilized quickly, and I added the meat and inserted the thermometer probe. I also threw on a slab of pork spares– next to the brisket on the top grate– and two butterflied four pound chickens on the middle grate . Over the next several hours, the temperatures hung rock-solid at 240�.

The meat temp rose slowly, but, suddenly, the remote thermometer reading jumped up 30� in a matter of seconds. I tested with an instant read, and found the remote to be in error. I turned off the remote, and then turned it back on, hoping it was just momentarily confused. It seemed to return to normal. Later, it did it again, so I just removed it, and decided to spot check with the instant read from time to time, when I turned and basted. Later I tried the remote again, this time to read cooker temperature, and it misbehaved similarly.

At some point, around 3-1/2 hours, I checked the chickens, which were done, and removed them to a warm oven to await dinner. At the 5-1/2 hour mark, I removed the ribs, sauced and foiled them, and placed them the oven along with the chickens. I later pulled the brisket flat when it reached 180� internal, and let it rest before slicing.

The ribs were very tender and tasty, but the brisket was the star– fork tender, juicy,and flavorful. I’ll try a whole one next time.
Garden in a Box

Posted by March 30, 2003

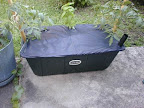
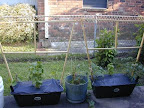
Last summer, I had a bit of success growing some herbs in pots out on the patio. I had out-of-control basil and some rather robust chives, but the oregano, thyme, and mint were pretty much a waste of time. This year, I decided to splurge and order two of the gardening container known as the Earthbox.

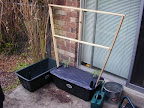
I had read about the Earthbox before, after seeing two of them at a home I visited when we obtained our second cat. At 30 inches long by 15 wide by 12 inches tall, they don’t require a lot of room, but are supposed to produce fantastic amounts of produce for the space and resources they use.

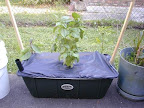
Last summer, I had purchased pots locally– that work somewhat like the Earthbox– to test the methodology. The design of the Earthbox includes a perforated platform to raise the potting mix about 3 inches off the bottom of the container. Two “wells” in the rear corners allow the soil to extend down into the bottom water reservoir. A large tube in the front corner provides a duct to add water to the 2.2 gallon reservoir. 50 to 60 dry quarts (2.5 cu. ft.) of potting mix are used to fill the box all the way to the top. After pouring two cups of dry granular fertilizer in a two-inch wide stripe in a manner appropriate for the plants being grown, a plastic “mulch cover” is stretched over the top.

The theory of this system is that plants take up moisture and nutrients “on demand”, with the water only being soaked up as needed, and the fertilizer similarly leeching into the soil from the stripe on the surface. The raised perforated platform allows soil aeration. The mulch cover serves to keep out weeds, and its dark color helps warm the soil. A hole in the side of the box just beneath the level of the raised platform prevents over-watering– just add water until it overflows the hole.

According to the amount of space and resources required, plants are planted by cutting holes in the mulch cover and creating a suitable hole in the potting mix. Tomato plants, for example, are limited to two plants per box, while other herbs or vegetables may be planted at the rate of up to 10 or more per box.

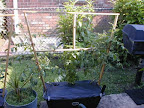
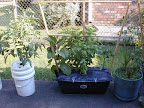
I chose to do two tomato plants in one box, and a variety of things in the other. For the second, I put a Japanese eggplant in one rear corner, and a bell pepper in the the other. I modified the fertilizer striping technique slightly to allow for a triangular area in the front center, where I put in a basil plant. I may also add some other small herbs in this area later.

If all goes as advertised, I should have more tomatoes than I know what to do with. I’ll add some pictures as things progress. I’m encouraged by the success I had with the small pots last summer– they, too, “sipped” water from a reservoir beneath a raised platform. I even planted seeds from an orange I ate, and now have two twelve-inch tall trees. Wonder how big they’d be by now in an Earthbox?

Dscn0140a.jpgDscn0143a.jpgDscn0146a.jpgDscn0147a.jpgDscn0152a.jpgDscn0153a.jpgDscn0155a.jpgDscn0225a.jpgDscn0226a.jpg