Category: Garden

Drip Irrigation

Posted by June 14, 2006

Watering the plants– you gotta do it, no matter what. No water, no garden. It would be nice if rainfall was predictable and regular enough to let nature handle things, but it just ain’t always so. Garden irrigation can be a real pain– if you water manually, you can’t forget to do it, especially during the heat of summer. You don’t want to under or over-water, and different plants have different requirements in order to do their best. One solution is to set up a low-volume or “drip” irrigation system. Using low-pressure tubing and dripper or sprayer heads, you can tailor your system to serve a variety of plants. Plants that need more can be supplied by adjustable drippers or spray heads; plants that need less can be supplied by fixed drippers that supply as little as one gallon per hour.

I found a lot of cool stuff by a manufacturer called Mr. Landscaper© that covers so many bases in low-volume irrigation, it’s hard to fathom what else you could possibly need to handle your garden and plant watering needs.

I did find one thing, however, and it really completes the whole setup. It’s the Orbit Sunmate Automatic Yard Watering System©. Although it’s aimed at high-volume lawn use, it’s wide range of operating pressures– from 10 to 80psi– allows its adaptation to low-volume irrigation quite nicely.The starter kit consists of 4 pieces: a digital multi-station, multi-cycle timer/controller, two electronic station valves, and a 4-outlet brass manifold. Mounting hardware is also supplied. It sells for around $40, which is a great deal, considering the manifold itself costs about $14 if you bought it separately. The controller can run a total of four valves, of which extras can be had for around $15. As a bonus, the controller and valves carry a six-year warranty.

You start by programming the watering duration of each valve or “station”. Additionally, up to four “on” times or “cycles” can be set. Although you can’t stagger the cycles of individual stations, the wide range of watering durations allows the amount of water to each type of outlet to be determined. For example, even though your drippers and sprayers will come on at the same time(s) each day, the drippers connected to one station could be set to run for up to 99 minutes while, at the same time, the sprayers connected to another station could be set to run as little as 1 minute. This allows for a great deal of flexibility.

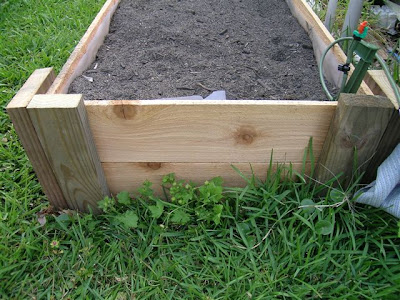
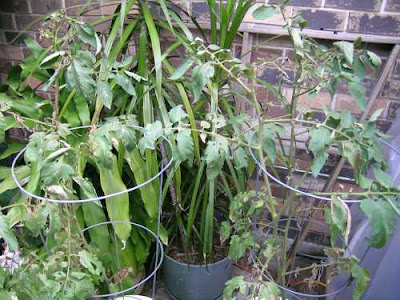
My current setup features one station which controls the outlets on a length of 1/2″ drip irrigation pipe. A combination of high-flow drippers and spray heads run for 90 minutes twice a day on a raised bed garden containing squash, tomatoes, basil, eggplant, peppers and ginger. Incoming water pressure on this station is controlled by a 25psi regulator in order to prevent the 1/4″ spaghetti lines from blowing off the connectors.

A second station’s outlet is fitted with a reducer/restrictor to feed a long length of 1/4″ spaghetti hose which branches out at its end to a number of 1gph drippers that are mounted on standard 10×20″ seedling trays. This station runs for 7 minutes at a time twice a day– enough to keep about 1/2″ of water on the bottoms of the trays most of the time, even on 90°-plus days. Pots in the trays soak up the water from below as needed. This works great for a variety of uses, including outdoor germination and growing starts until they are ready to be transplanted into the garden. Certainly some herbs could even be left to term in this setup.

I’ve recently purchased two additional station valves to max out the system, and am looking forward to an excuse to utilize them in the near future.

The Orbit system (#62032) and extra valves (#62035) are available at The Home Depot; a full range of Mr. Landscaper products are featured at Lowe’s.

Vermi-Composting

Posted by June 13, 2006

Feel bad every time you look in the refrigerator vegetable crisper bins and find stuff going to rot? There’s a gardening bright side to this dilemma, and it’s called vermi-composting.

What’s that, you ask? It’s actually nothing more than a fancy term for composting using worms. It’s easy, and is probably one of the best things you can do for almost all your plants.

Worm castings, as they are called (conjuring up images of industrious little worms gracefully “casting” their… well… their “worm poo”), are one of the most nutrient-rich forms of organic fertilizer you can use. All you need is a dark-colored, covered-but-vented bin, some kitchen scraps, some moistened shredded up newspaper, and a pound or so of worms.

Not just any worms, mind you, but a couple of particular species that excel at producing this gardener’s black gold. The most common species used are the red wiggler (eisenia foetida) or the so-called European nightcrawler (eisenia hortensis), with the red wiggler being the most popular. The Euros are a bit bigger, and reportedly don’t produce quite as fine a final product, but, if they’re all you can get, should work just as well.

A dark-colored bin is best, since the worms don’t like light. Some ventilation is mandatory, and a method of drainage is also useful. You could use a plastic tote bin, found nearly everywhere, to start vermi-composting. Poke a few dozen holes in the lid with a very small nail– worms can squeeze through holes as small as 1/16 of an inch. Do the same around the perimeter of the bin about 2″ up from the bottom. Place a thick layer– 6 inches or more– of shredded moistened newspaper in the bottom. Not too wet or packed too tight– make it a bit fluffy, and none of the shiny slick stuff– and then add your worms. They will immediately burrow down into the newspaper to get away from the light. Add some vegetable scraps from the kitchen, cover them with a few layers of wetted newspaper (not shredded), and put on the lid. Check under the newspaper every few days to see the worms’ progress, adding more food scraps only as necessary. Add some more moistened torn-up newspaper from time to time, too– they’ll eat it as well.

Don’t have a paper shredder? Let your worms help prevent identity theft by feeding them your last month’s credit card statement– with today’s soy-based inks, your worms will devour it with no problem. Ultimately, your worms will eat half their weight in food every day!

A word about kitchen scraps: Vegetable or fruit peelings, coffee grounds, tea bags, stale cereal are all fine. No meats, fats, bones, or dairy products. Some say no onions or garlic as these have an antibiotic effect on the beneficial microbes in the compost. Others say go light on citrus rinds, as the the worms don’t like the acidity. Your worms will like you more if you chop up their food somewhat before adding it to the bin– it will make their work easier and faster. For tougher scraps, like broccoli stems, go ahead and cook them with the people part of the food, and then pluck out the worms’ share before serving. Also, be ready for a surprise if you put vegetable seeds in your bin– they’ll germinate and sprout like crazy in this dark, moist, fertile environment.

If you can, provide some kind of drain in the bottom of your bin, even if it’s only a hole with a cork in it. Moisture will work its way down and collect in the bottom. Draining it has several benefits. One, you won’t have any drowned worms– unlikely, but possible. Second, the liquid that you drain out isn’t trash, it’s the liquid form of this gardener’s black gold– worm tea. It will be very concentrated– you can add a mere few ounces of it to a gallon of water, and it will still be darker than strong coffee. Give all your plants a treat while you wait for the worms to finish their work. In a ten gallon tote bin, you can even safely add about a quart of water a week to help create more tea without seriously affecting the worms. Just don’t forget to drain it out and use it. If there’s more than you can use up, keep it in a jug with a hole punched in the cap, so the beneficial microbes therein can breath.

Keep your bin in a relatively cool location out of direct sunlight if kept outside. A garage or basement are also good spots. You can even keep it in your kitchen if you want– it has no unpleasant odor whatsoever (unless you perpetually over-feed). At most, your bin should have a subtle, natural, earthy aroma.

Once your compost is ready, it’s time to harvest it. How do you know it’s ready? Like regular compost, you won’t be able to discern any of the materials you put in the bin originally. Nothing will look like paper or kitchen scraps or tea bags at all.

How do you harvest it if it’s still full of worms? Simple. One way is to only feed them on one
side of the bin. The worms will move to that side to feed, leaving the other side virtually worm-free. Another way is to spread out sheets of newspaper on a table. Gently scoop out baseball-sized mounds of compost and place them in rows on the newspaper. Turn on a bright light directly overhead. The worms will move downward in the mounds, and you will be able to brush or scoop off the tops of the mounds a little at a time as they do.

The bin described above will produce plenty of worm compost and worm tea for the average gardener or plant keeper, but, if you prefer a more elegant solution, there are products like the Can-O-Worms.

It has a vented base, a vented cover, and three trays which are used in rotation. You start with a single covered tray sitting in the bottom section, and feed the worms until the compost fills the tray up to a certain level. Then you add another tray, and put some newspaper-covered food in it. The worms move up to the upper tray as they finish composting their food and bedding in the lower tray through hundreds of worm-size holes. The bottom section even has an island for worms who fall through the bottom tray to get out of the collecting liquid and back up into the trays. A handy drain with a valve is provided to dispense worm tea. A starter block of bedding is included– about the size of a large brick, it expands to almost 4 gallons in volume when water is added. The worms, if not available locally, can be mail ordered from worm farms all over the country. Keep them happy, and they will make vermi-compost– and lots more worms– for years to come.

Raised Bed Garden

Posted by April 16, 2006

Not abandoning hydroponics by any means, I decided to try to go organic this season with a raised bed. I built mine 2 ft. by 12 ft. to go along the edge of a patio.

Construction, after a bit of design brainstorming, was fairly straightforward, and I was filling it up with soil in about an hour and a half.

I used 6’x5.5″x5/8″ cedar fenceboards. Corners are pressure treated 12″ 2x4s screwed perpendicular to 12″ 2x6s. Bottoms of 2x6s have 3/8″ holes drilled 5″ deep into which 12″ 3/8″ re-bar is inserted. These will serve to stake the box to the ground. Due to the 12 ft. length, center supports made of 12″ 2x6s, again with the re-bar, tie the 6 ft. sections together in the middle. There’s some very minor bowing at the middle, so I may or may not add something across the top, front to back, to pull it in line. 1-1/4″ galvanized screws attach ends of cedar boards to insides of corners and center connectors, 1″ down from tops of corner pieces so another layer can be stacked on top later if desired. 6 mil plastic sheeting lines the inside walls, but not the bottom– two layers of heavy cardboard are laid out in the bottom to shut out the grass.

The local organic nursery delivered a yard and a half of organic garden mix in a super sack. Really nice stuff, and with the surplus, I’ll have enough to beef up the beds in front of the house and fill another 6×6 foot raised bed . Plus, I have the compost pile going since last summer, and a worm bin that puts out some really good stuff for fertilizer.

DSCN0240.jpgDSCN0242.jpgDSCN243a.jpgDSCN0239.jpg

Let’s Build A Light Stand


Since my fall growing season pretty much got blown out of the water by recent catastrophic weather events, I decided to look ahead towards spring and start making preparations to be ahead of the game for once. To that end, I took the high intensity compact fluorescent light fixture I bought (last year) and constructed a stand for it. Now it can be put to use starting all my spring seedlings. A quick trip to the Home Improvement Center was all it took…

For this project, you will need:

(1) Lights of America model 9266 65-watt Compact Fluorescent Floodlight
(15) feet of 3/4″ Schedule 40 PVC pipe
(4) 3/4″ elbows
(2) 3/4″ tees
(2) 3/4″ caps
(1) 3/4″ slip x slip coupler
(1) 1/2″ FPT x 3/4″ slip bushing
(2) 1″ x 1″ x 3/4″ tees
(2) 1″ lengths of 1″ Schedule 40 PVC pipe
(1) 8-foot replacement power cord with plug
PVC pipe cutter
drill with 3/8″ bit
file or sandpaper

Some stores sell 5-foot cut lengths of pipe in addition to the stock 10-foot lengths. If you have this option, all the pieces necessary can be cut from these two lengths. The hardest part may be obtaining only two inches of the 1″ pipe.

Cut the 3/4″ pipe into six pieces 22″ long each, two pieces 10-1/4″ long, two pieces 2″ long, and one piece 6″ long. From the pieces of 1″ PVC pipe, remove approximately 1/4 of the circumference of each using the PVC cutter or a hacksaw, creating two “C” clips.

Approximately 1-1/2″ from the end of one of the 10-1/4″ pieces, drill a 3/8″ hole. File smooth any rough edges, inside and out. IMPORTANT: Use NO PVC cement until you are satisfied with the fit and orientation of the entire finished assembly. Cement is optional as friction fit alone should sufficiently allow the assembly to remain rigid, and will allow disassembly for storage or later modification as you see fit.

For the main frame, assemble a rectangle using four of the 22″ lengths of pipe, two of the 3/4″ elbows, and two of the 3/4″ tees, with the elbows at the top and the tees at the bottom, oriented so the remaining openings are facing downward. Into each of the remaining tee openings, insert the 2″ lengths of 3/4″ pipe which have already been inserted into the last two 3/4″ elbows. Place the 3/4″ caps on one end of each of the remaining 22″ pipes, and insert their opposite ends into the open elbows, orienting them perpendicularly to the rectangular frame.

Next, assemble the lightbar. Insert the 1/2″ FPT x 3/4″ bushing into the 3/4″ coupler. Place a 1″ x 1″ x 3/4″ tee on one end of each of the 10-1/4″ pipes, nearest the hole on the drilled one. Insert the wires of the light fixture into the threaded bushing end of the bushing/connector assembly. Before screwing the fixture stem into the bushing, wrap it with a few turns of Teflon tape. Thread the pigtail end of the replacement power cord through the 3/8″ hole in the one 10-1/4″ pipe so it exits the pipe at the end furthest from the hole. Then thread it next in through one side of the “top” of the remaining 3/4″ tee, and out the adjacent “bottom” side of the tee. Continue threading it through the 6″ pipe. Use wire nuts supplied with the fixture to connect the wires, white to white and black to black. If the power cord has a green ground wire, it can be left unconnected, but do not allow it to contact either the white or black wire connections. Fold the wires and connectors so that they may be inserted into the 6″ pipe. Remove slack in the wiring by gently pulling the power cord back throught the drilled hole somewhat as you assemble the bushing/connector, the 6″ pipe, and the 3/4″ tee. Insert the other 10-1/4″ pipe and tee into the remaining 3/4″ tee opening.

Temporarily remove the top bar and elbows of the rectangular frame. Slide the 1″ PVC “C” clips over each of the 3/4″ uprights, positioning them each about halfway down each pipe. Now, positioning the 1″ x”1″ x 3/4″ elbows on either end of the lightbar assembly vertically, slide the lightbar onto the uprights, allowing it to rest on the “C” clips which will slide into the lower openings of the lightbar tees somewhat. The clips will provide a means of height adjustment for different stages of plant growth. Two standard 20″ propagation trays fit comfortably between the legs with the lamp centered above them.

Total cost, not including the $35 light fixture, about $15.

ADDENDUM: While disassembling and reassembling the light stand to photograph it for this article, I subsequently found the Lights of America fixture would no longer light up. After some internet searching about the unit and the company, I found that consumer research determined that the [proprietary] LOA lamps typically fall far short of their rated life and output, and that the fixture itself uses a cheap coil-and-capacitor electronic ballast. Bottom line is my light unit, even though technically brand new, is out of warranty and, after about 5 minutes’ use, is now a total piece of trash. The light stand, however, may still be of use. I’ll have to see what other light unit I can find to complete it.

Dscn0206a.jpgDscn0207a.jpgDscn0208a.jpgDscn0209a.jpgDscn0210a.jpgDscn0211a.jpgDscn0212a.jpg

Making A Composter

Posted by July 23, 2005

If you do a lot of gardening, you know how valuable compost can be towards enriching the soil and improving plants. Rich in organic material, compost acts as a soil conditioner and nutrient source, and also contains beneficial microbes that assist in making those nutrients
more readily available to your plants.

Commercially-available compost making units seemed rather costly to me, so I decided to build a one out of an old trash can. Holes had been worn in the bottom of the can over nearly two decades of use, but I figured it could continue to be of service in a different way.

All the necessary materials: One old 32-gallon RubberMaid trash can with lid, and a length of 4″ diameter corrugated, perforated plastic drainage pipe (available from most home improvement centers).

Necessary tools for the project include a cordless drill, a 4″ hole saw, a 5/8″ wood bit (the kind with points at the outer edges), and a pair of heavy kitchen shears.

A length of the pipe was cut 33″ long, to the next nearest widest corrugation at each end. Rough edges were cleaned up, but the kitchen shears do a reasonably neat job, anyway. The flanged ends were cut perpendicularly 1/2″ deep at the 12, 3, 6, and 9 o’clock positions. 4″
holes were sawed in the bottom center of the can and center of the lid– it was easiest to center the holes by drilling from the inside surfaces in both cases. Since the pipe is 4″ in diameter at the narrowest point of the corrugations, these were necessary to pass the
pipe ends through the 4″ holes, but then “lock” the pipe in place. This task was more difficult at the bottom end, as the can is thicker and less pliable than the lid, but the tightest fit possible is preferred.

5/8″ holes were then drilled in a regular fashion all around the can– 24 all total. 4 additional holes were drilled in the lid as well.

Conveniently, the yard man chose not to use the mulching mower this week. Lots of starter grass clippings, leaves, pine needles. Kitchen waste and shredded paper will be added also.

Total project cost: an amazingly low $3.48! Actually, only $1.16, as there is enough pipe left over from the 10 ft. length to make two more. If you wanted to make one out of a brand new can: $13.08.

Funny part of the story: As I was completing the project, my neighbor came out to wash his car and asked what I was doing. When I told him I was making a composter, he said he had one he didn’t use and I was welcome to have it– for free. Turns out it’s an Earth Machine,
which the local municipality gave out free to residents several years ago in an effort to reduce landfill waste. Seems they normally sell for about $60-70. They appear to be nothing more, really, than an eye-pleasing way to make a compost pile, but include venting, an
adjustable-vented lid, and a door to remove compost. It may well not work any better than my can project, but, for free, I’ll give both a try. I can see already, however, that my design has one advantage– all I will need do to give the pile a stir with mine is lay it on its side
and roll it around the yard a bit. Between the lid’s built-in clips and the chimney flange holding it, the lid should, hopefully, stay firmly in place. The good news is that the compost that was left in the bottom of the Earth Machine will make a fine inoculant for both compost piles.

Dscn0052a.jpgDscn0053a.jpgDscn0054a.jpgDscn0055a.jpgDscn0056a.jpgDscn0057a.jpgDscn0058a.jpgDscn0059a.jpg

5-Gallon Bucket Tomato Planters Revisited

Posted by May 22, 2005

Now that all danger of frost has passed– 5 weeks ago in fact– it’s time to plant some tomatoes. The bucket containers from last year got a thorough cleaning and disinfecting and are ready to go…

The bucket containers sat out on the patio all winter, and they ended up turning themselves into four foot potted night-blooming jasmines.

For those unfamiliar, night-blooming jasmine is really great in the summer. Throw open the patio door after dark and their fragrance fills the house, and the neighborhood as well. They grow ten feet tall, and propagate themselves at the drop of a hat. Don’t worry about winter freezes with this stuff– you can’t kill it, and it will be back with a vengeance next year.

Anyway, after extracting the jasmine from a couple of the bucket containers, and getting them scrubbed out and disinfected with a spray bottle full of hydrogen peroxide, it was time to plant.

This year, after the dismal results last year with creole tomatoes, I went an entirely different direction. I chose the Celebrity hybrid for its disease, drought, and heat resistance. This variety is also a determinate, which means it will grow to a fixed height– about 3 feet– and stop. It also means it will set its fruit almost all at once. Fortunately, it is quick to maturity, so I should have something to harvest within about 60 days.

I buried about 50 percent of the plants in the soil– this will increase rooting, and help the plants to develop strong stalks.

I also added one more thing over years past, which was to place a large handful of cypress mulch around the base of the plant. This should help preserve moisture even further than just the bucket lid, and will keep soil-borne pathogens off the lower leaves of the plant. Once these starts get about a foot and a half tall, I have some cages to support what I hope will be lots of tomatoes.

Dscn0031a.jpgDscn0032a.jpgDscn0033a.jpgDscn0049a.jpg