Category: Garden

5-Gallon Container to Hydroponic Conversion


I cleaned out one of the 5-gallon containers to convert it to a self-contained hydroponic system. If you view the original photos here, you can get an idea of what I am about to describe.

I removed the one-inch filler tube and passed the power cord of a tiny submersible hobby pump up through the hole. To the outlet of the pump, I attached a length of 3/8″ ID vinyl tubing, which was also directed up through the hole alongside the power cord. The wick cup remained in place to function as it had originally, in case of pump or power failure. Cypress mulch was then used to fill the container to within about 3″ of the top. The top bucket was then inserted into the bottom bucket. Water was added from the top until the bottom bucket overflowed from the original overflow hole. The bottom bucket was then emptied to dispose of the fine debris that rinsed out of the cypress mulch. The bottom bucket was then filled with one gallon of clean water, and appropriate nutrient added. The system was then re-assembled and the pump powered on. Adjustment of flow rate is accomplished by rotating the vinyl tube, which results in the turning the outlet of the pump which has a variable flow restrictor.

The pump is a ZooMed MicroPump 104, designed for reptile tanks or the like, and available for under $15 usually. Its rated flow is adjustable from 35-70gph, which translates to about .5-1gpm. I also like the fact that it can run dry without damage.

I planted an already-sprouted mirliton– aka vegetable pear or chayote squash– someone gave me to see how it would do. You can see it here.

I came to realize, after a few hours operation, that more particles found their way to the pump intake, slowing it considerably. An aquarium filter pad, about 4″ by 6″, wrapped around the pump and secured by a rubber band provided a solution.

Dscn0299a.jpgDscn0300a.jpgDscn0135a.jpg

Tomatoes in January


My verticillium wilt-challenged creole tomatoes continue to soldier on in spite of their malady. Today, I counted 17 fruits set on the ever-expanding vines– 18 if you count the one I knocked off by accident. Pulling down the shadecloth on that end of the greenhouse last week seems to have been a good idea.

I downloaded several winter kale recipes today in hopes of harvesting and consuming most of it before I turn my attention to a spring tomato crop– one that does not include the apparently-resistant-to-nothing creoles. I may try Better Boy, Celebrity, plum, Roma, cherry or Sweet 100’s.

I plan to convert the 5-gallon containers from last summer to Dutch pots, which should comfortably house tomatoes, and perhaps some cucumbers, bell peppers and squash, all of which should hopefully do nicely on the same nutrient.

[January 31st: Make that 30 tomatoes.]

[February 8th: I stopped counting at 40.]

[February 12th: 51.]

Strange Day


Went to the New Orleans Museum of Art today for the members’ preview of the The Quest for Immortality: Treasures of Ancient Egypt exhibit.

As the exhibition title suggests, the focus was the ancient Egyptians’ “denial of the physical impermanence of life”. Featured were works of art, jewelry, sculpture, funerary paraphernalia, an actual mummy, and a recreation of the burial chamber of King Thutmose III. Not as much bling-bling, but more artifacts than King Tut.

Numbered exhibits also included narration through handheld radio players, which was very useful in explaining the complex hieroglyphic detail rendered on the interior walls of the burial chamber and the story it told.

As we exited the exhibit, we were suprised to see the man himself, Zahi Hawass, Egypt’s Secretary General of the Supreme Council of Antiquities, signing copies of his book Secrets from the Sand: My Search for Egypt’s Past. But that wasn’t what made the day strange…

On the way to the museum, on a side street we often take in this area of town, a vehicle slowed in front of us. In the back seat was a woman berating the other occupants of the car as she tried to exit the vehicle while it was still moving. Her escape was impeded when her sandal became trapped under the rear wheel of the car as it stopped.

The driver then backed up slightly to allow her to free her foot, but she continued to complain as she again attempted to exit the car. As she did, someone still inside the car tried to keep her from leaving (escaping?), apparently, by holding onto her dress, a knee-length denim shift, which quickly rose above her waist, and then– when the buttons down the back of it disengaged– came completely off!

So here’s this blonde standing stark naked, and I do mean nekked— except for the aforementioned sandals– in the middle of the street, holding her dress, and continuing to curse at the occupants of the car (who, incidently, did not happen to share her ethnic background, if you get my drift). The driver then pulled the car off to the side as the woman, still ranting, slipped back into her garment. It seemed like a good time, at that point, to continue on to the museum.

Greenhouse

Posted by August 12, 2003

My container garden project this spring would have gone a lot better except for two things. One, a weeklong period of hot sun with no rain really took a toll on the tomato plants, even though I set up a system to spray mist the foliage. Second, at some point, the critters started finding my plants– I must have thrown out over a dozen affected tomatoes.

Having my plants in a greenhouse would have– or should have– solved both of these problems. With the embarkation on my hydroponic system, I decided to construct a small greenhouse.

I found plans on the internet for a simple structure using PVC pipe to create a quonset hut-shaped “hoop house”. Covered with 6 mil clear polyethylene film and strategically placed shade cloth, it should keep out critters, control temperature, and retain moisture.

I decided on making it 9’x12′ since I have a slab extending my patio of roughly those dimensions that I rarely use. In that location, it will get good wind protection from the west and north, but it will still have to be anchored down to prevent any mishaps. With the addition of an exhaust fan and some venting, I should be able to provide an environment conducive to some vegetables, lettuces, and herbs.

I bolted together a frame out of treated 2x6s on-edge, nine by twelve feet, to fit on a section of my patio. 10 by 12 or even 12 by 12 would have worked using the same PVC and plastic sheeting. Using some mending plates, I made some L-shaped brackets to secure the frame to the slab.

The ribs are made from 3/4″ schedule 40 PVC, 10 foot lengths. Using 3/4″ crosses and tees, the ribs are joined together spaced 24″ apart. The top crossbar is from pieces cut 22-3/8″ (I think) to achieve the 24″ spacing once assembled. I did not use cement, but, in retrospect, should have, as one end joint worked loose over time from minor shifting in the wind. A 10 ft. length of 1/2″ electrical conduit inserted inside the top bar before the last end rib is installed aids rigidity. The ribs are secured at the bottom with heavy gauge pipe straps– I think you need to buy 1″ to fit 3/4″ PVC– on the inside of the 2×6 frame.

The cover is 6mil polyfilm sheeting from Home Depot. I have plenty left to re-do it whenever it becomes necessary– a roll 20 feet wide by 100 feet long was around $60. (What’s on there now still looks OK after nearly a year.) I made a dozen or so clamps from 1″ PVC by cutting slices 1-1/2″ in length and then removing a bit more than a quarter of their circumference, and sanding all sharp edges and points smooth. I applied the film on the ends first, wrapping from the inside, over the top of the end ribs, and making a short slit at the top center to fit around the top crossbar. Then a 13 by 20 foot piece went over the top, and both the end sheets and the top were secured by the same clamps at several points. Finally, the bottom of the sheeting was secured all around from the inside by folding it inward and screwing 2″ treated lath into the top of the 2x6s with the poly sandwiched between. Additional items included an X-shaped brace on one end to add rigidity, and a screen door made of treated 1x2s on the other.

You can get by in the winter months using a cheap box fan for airflow, but in the summer an enclosed hoop house such as this will need some serious ventilation to keep the temperature in line. Shade cloth alone won’t cut it. You might even consider making the ends out of screen instead of plastic.

Hydroponics

Posted by August 12, 2003

While researching a problem I was having with my container gardening project, I ran across something rather interesting– hobbyist hydroponics. While I was aware of the concept of growing plants without soil– a recent visit to Walt Disney World had an exhibit featuring various hydroponic systems on a large scale– I was not aware how many people grow vegetables, herbs, etc, successfully on a small scale.

I found that there are several techniques to grow hydroponically, and that– compared to growing in soil– the results are fantastic. For example, the time from planting tomato seedlings to harvesting vine-ripe mature fruits is significantly shortened– from three months or more down to as little as eight weeks.

I decided to embark upon a new project, and build my own hydroponic system. I settled on a particular design that employed a hybrid concept to supply nutrients to the plants.

It might be best to take a moment and discuss some of the various hydroponic methodologies. The simplest involves just dripping a nutrient solution over the root area of a plant which is physically supported by an inert medium like pea gravel, perlite, or the like. The nutrient is then “discarded”, meaning it is not recirculated over the plant roots again. This isn’t a very efficient or cost-effective method, so it is rarely used.

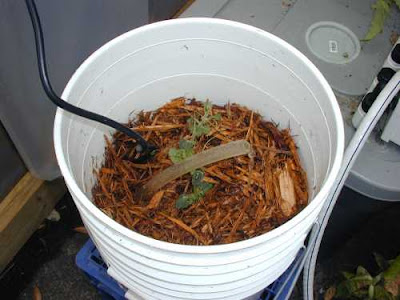
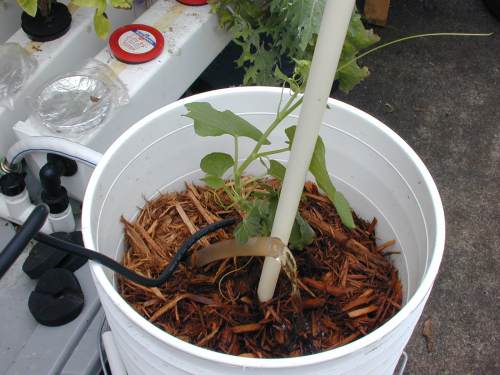
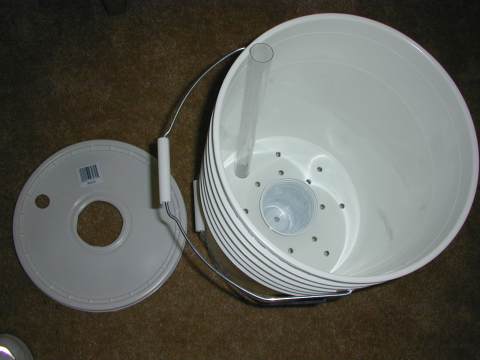
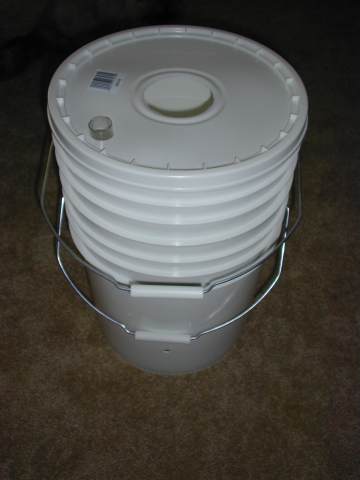
Another simple technique is to create a bubbler system from plastic bucket-type containers. Stacking a 3.5 gallon bucket in a 5 gallon bucket is a popular design. The smaller bucket’s bottom is perforated and then placed inside the larger The space between the bottoms of the buckets serves as a nutrient reservoir. An aquarium air pump is used to power a tube system that “bubbles up” nutrient solution from the reservoir to the top of the planting media in the top bucket where it trickles down over the roots and, ultimately, drips back into the reservoir through the perforated bottom.

A different approach employs a method know as “ebb and flow”. In this method, plants are placed in an inert medium in small pots which are arranged in a large six-inch deep tray. Using a timer to control a pump in a reservoir below the tray, nutrient solution floods the tray– and the pots– for a specific interval, and then drains back to the reservoir. During this “ebb” time, the plant roots are kept moist by the growing medium, but are also exposed to increased amount of oxygen.

A system similar to ebb and flow, but simpler, is called deep flow. Pots remain submerged in nutrient solution, but the solution is oxygenated and recirculated constantly.

A more sophisticated system, called NFT– Nutrient Film Technique– employs the concepts of both feeding and supplying increased oxygen to the roots, but does them at the same time. Plants are situated in an inert medium in “net pots”, which are plastic pots with many small slots in their sides and bottom. The pots are inserted in the covers of plastic channels, known as gullies, through which a shallow film of nutrient solution flows. The slots in the pots allow roots to grow through the pots down into the nutrient film.

An offshoot of hydroponics is aeropononics. Also a soilless growing method, aeroponics goes one step further to almost eliminate the growing medium itself. In an aeroponic system, plants are suspended with their roots hanging in an opaque chamber. Nutrient is sprayed on the roots or misted in the chamber either constantly or at specific intervals.

My hybrid system employs elements of deep flow, NFT and aeroponics. Rather than have nutrient pumped in at one end of a gully to flow past roots on its way back to the reservoir, it is instead sprayed onto the net pots at each plant site. Additionally, the drain at the reservoir end of the gully is adjustable, allowing the depth of the film flowing down the bottom of the gully to be varied from very thin all the way up to nearly filling the gully. This adjustability allows seedlings placed in the system to start out under the deep flow technique, and, as their roots grow longer, the depth can be lowered allowing more oxygen to the roots in a hybrid aeroponic/NFT system.

This is not an original design. I found a commercially available system that very apparently uses mostly commonly available materials in its construction, so I decided to build one myself. After a few hiccups, I eventually got everything I needed and assembled the system. Some pics here.

5-Gallon Bucket Garden Container Project

Posted by May 4, 2003

I came up with an idea to use a couple of 5-gallon plastic buckets to approximate an Earthbox-type planter. The buckets happen to stack with about 4 inches of space between the bottoms of the two. This space will serve as a water reservoir.

I cut a 3-1/2-inch hole in the bottom of one bucket, as well as 16 3/8″ holes for soil aeration. A 16-ounce plastic Solo or Dixie cup placed in the hole serves as the “wick” for the potting mix to absorb water. Cutting slits in it allows the water to pass through.

The only mod to the lower/outer bucket was to drill a 3/8″ hole in the side just below the bottom edge of the upper/inner bucket, to serve as an overflow and to allow air in. One of the 3/8″ holes near the edge of the inner bucket was enlarged to accept a length of 1″ rigid plastic
aquarium tube for a water fill tube. I purchased a single bucket lid, in which I cut a 3″ hole in the center for a single tomato plant, and also a 1″ hole to accomodate the watering tube. Before putting the lid on, I spread about a cup of granular fertilizer in a thin ring around
the outer edge of the surface of the potting mix. Then the lid was put on and the tomato plant was planted thru the center hole. Should be enough to sustain a single plant for an entire season.

Project cost: Buckets $2.50 (x2); lid $.97; 1″x18″ tube $1.50; plastic cup free; 25 dry quarts potting mix $2.99; 1 cup dry fertilizer and 1 cup hydrated lime (to condition soil for tomatoes) ~ $.50. Total approx. $11.00.

Dscn0149a.jpgDscn0150a.jpgDscn0151a.jpg